In this guide: all 11 posters
A Day of the Dead collaborative poster can give students a shared art task while opening a careful conversation about remembrance, family traditions and visual storytelling. Start with a reliable introduction to Día de los Muertos, choose a design for your lesson, then bring individual coloring tiles together into one classroom display. This guide compares the complete collection with product images and a different teaching idea for every design.
This guide covers all 11 products in the Day of the Dead collection, checked on October 24, 2026. Each product has its own explanation, suggested classroom extension, two linked previews and a direct shop link. The teaching extensions are suggestions for your lesson; check each listing for the actual files included.
Browse the complete Day of the Dead collection.
Looking for the printables? Browse the Day of the Dead collection ↗ or use the classroom plan below.
Introduce Día de los Muertos with context
Día de los Muertos, or Day of the Dead, is a tradition of remembrance rooted in Mexico's Indigenous cultures and shaped over time through encounters with Catholic observances. Many celebrations center on November 1 and 2, although timing and practices vary among communities. It is a distinct observance from Halloween. Flowers, food, photographs and ofrendas can help families honor people who have died. Begin a classroom art project with a short, attributed account from a museum or cultural institution so students encounter the people and meanings behind the imagery.
Name the culture and the source: Introduce Día de los Muertos in its Mexican and Indigenous contexts. Use a named museum, artist, family or community account, and explain that an example describes a particular practice rather than every Mexican family's experience.
Keep learning about a tradition distinct from practicing it: Describe the poster as a contemporary classroom art resource. Discuss the significance of an ofrenda through a documented example, without requiring children to recreate a religious practice or presenting the worksheet as a complete cultural experience. This is a suggested teaching approach.
Let personal remembrance remain optional: As a classroom choice, offer observation, vocabulary or art responses alongside any invitation to share memories. Avoid requiring a family photograph, a deceased relative's name or a public account of grief; students can participate fully through the art task.
Use precise language for the imagery: Explain that calaveras are skulls and papel picado is decorative cut paper. Keep the context of remembrance visible, and avoid describing Día de los Muertos as Mexican Halloween or reducing its imagery to spooky costumes.
Choose a poster for your learning goal
For observation and descriptive language, compare Grow Flowers for Those We Remember and Petals Carry Our Love. Stir in Love, Share a Memory offers a connection to food stories; Little Paws, Lasting Memories brings an animal theme. Bring a Memory to the Ofrenda can accompany a researched introduction to ofrendas, while A Portrait Framed with Love provides a portrait-focused option. These are different classroom illustrations, not a complete account of a living tradition.
For another cultural learning project, use the Hispanic Heritage Month guide, or return to the collection directory.
Compare all 11 designs
| Poster message | Suggested classroom use | Listed format | Product |
|---|---|---|---|
| Treasures of a Life Remembered | A close-looking art lesson about detail and remembrance | 25 tiles; 35 × 35-inch display | View product |
| Grow Flowers for Those We Remember | Exploring flower shapes and a coordinated group palette | 25 tiles; 35 × 35-inch display | View product |
| Together We Remember With Joy | An inclusive group mural with an observation-and-language extension | 25 tiles; 35 × 35-inch display | View product |
| Stir in Love, Share a Memory | Connecting visual art with discussion of food and storytelling | 25 tiles; 35 × 35-inch display | View product |
| Petals Carry Our Love | Comparing natural forms in a flower-and-butterfly composition | 25 tiles; 35 × 35-inch display | View product |
| A Place to Remember, A Moment to Share | Learning ofrenda vocabulary through a source-supported display | 25 tiles; 35 × 35-inch display | View product |
| Little Paws, Lasting Memories | A character-focused art project with an optional writing connection | 25 tiles; 35 × 35-inch display | View product |
| Butterflies Carry Our Remembrance | An art-and-science connection with careful cultural attribution | 25 tiles; 35 × 35-inch display | View product |
| Bring a Memory to the Ofrenda | A museum-source discussion about remembrance and objects | 25 tiles; 35 × 35-inch display | View product |
| Celebrate Lives / Cherish Memories | Combining a collaborative display with a descriptive writing task | 25 tiles; 35 × 35-inch display | View product |
| A Portrait Framed with Love | Studying framing and lettering in a shared art composition | 25 tiles; 35 × 35-inch display | View product |
1. Treasures of a Life Remembered Collaborative Poster
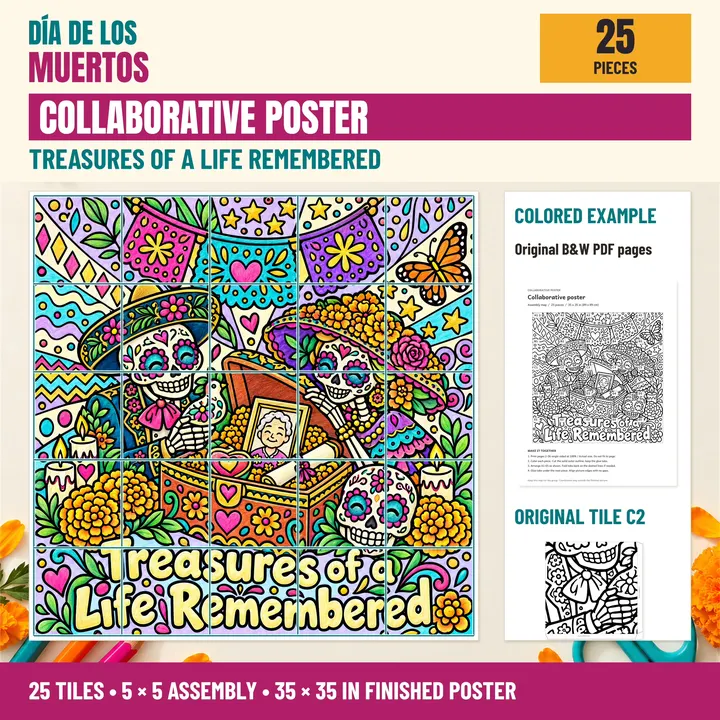
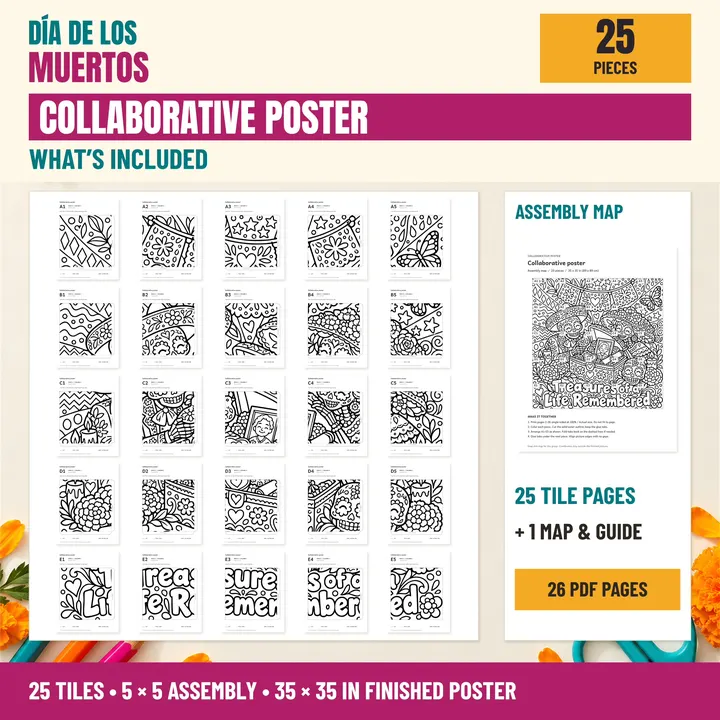
Treasures of a Life Remembered brings sugar skulls, marigolds and lettering together in one square composition. The intricate line work gives students plenty to notice before choosing their colors. As the separate sections meet, small decorative details become part of a much larger image. This design suits a classroom display that invites careful observation, with the emphasis on how artists use flowers, patterns and words to communicate a theme of remembrance.
Classroom idea: Before coloring, invite partners to identify a repeating line or shape in their pieces. After assembly, let them trace that feature across neighboring tiles. Add short student-written labels describing the visual choices they noticed, without asking anyone to disclose a personal loss.
Best for: A close-looking art lesson about detail and remembrance
Details from the listing:
- Printable PDF
- 25 picture tiles, each 7 × 7 inches
- 35 × 35-inch assembled poster (89 × 89 cm)
- A1–E5 assembly map and built-in glue tabs
2. Grow Flowers for Those We Remember Collaborative Poster
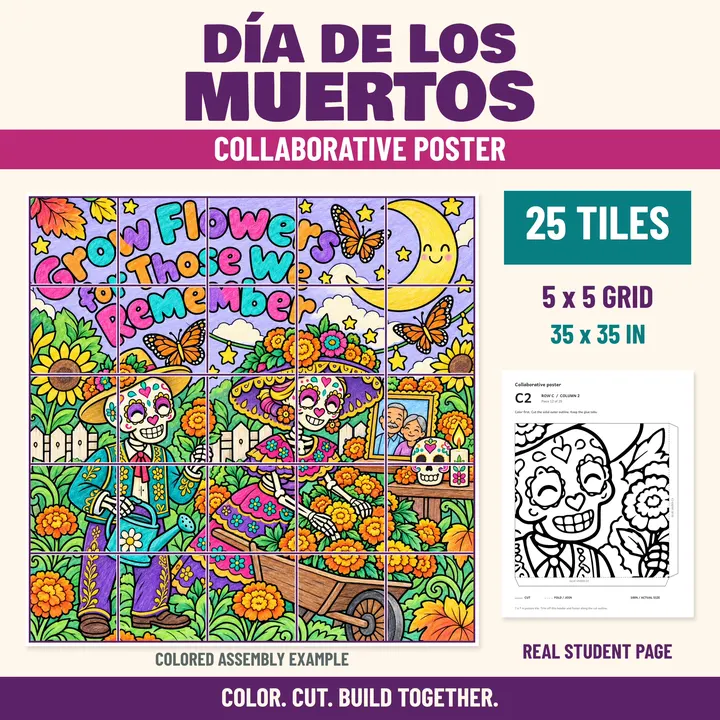
Grow Flowers for Those We Remember combines marigolds, butterflies, calavera imagery and a family picture frame. The flower-focused message gives this poster a clear visual starting point for an art center: students can look for petals, curved outlines and contrasting spaces within the drawing. The finished mural brings those individual decisions together. Pair the coloring with a reliable cultural source so students can distinguish the artwork's decorative features from the meanings families may attach to them.
Classroom idea: Create a shared color key for the flowers while leaving other details open to individual choices. Ask students working on adjoining tiles to compare their edges before assembly. Discuss how a repeated color can guide a viewer's eye around a large collaborative artwork.
Best for: Exploring flower shapes and a coordinated group palette
Details from the listing:
- Printable PDF
- 25 picture tiles, each 7 × 7 inches
- 35 × 35-inch assembled poster (89 × 89 cm)
- Assembly map, cut lines and glue tabs; print single-sided at 100%
3. Together We Remember With Joy Collaborative Poster
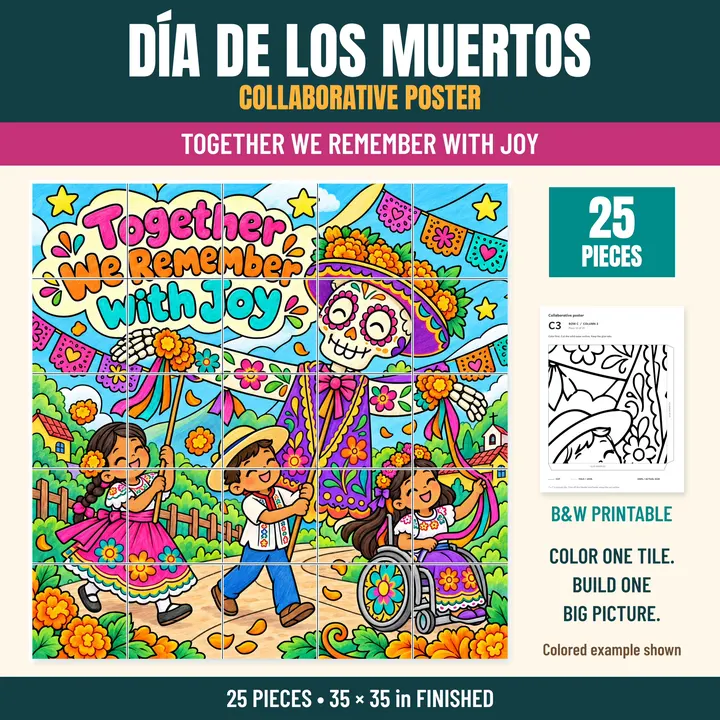
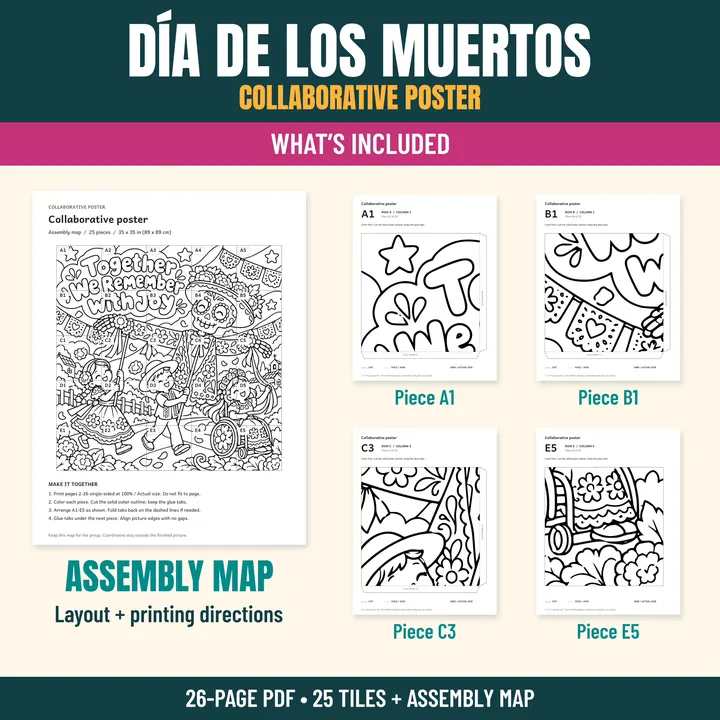
Together We Remember With Joy shows children alongside a calavera, papel picado and marigolds. The listing identifies a child using a wheelchair within the group, giving teachers a concrete detail to include in a conversation about representation in artwork. Students contribute to the same scene through separate coloring tiles. The message makes this a useful choice when the class wants to focus on togetherness while learning that Día de los Muertos is a living cultural tradition.
Classroom idea: After assembling the mural, invite pairs to describe what the children are doing and name one detail that makes the scene feel welcoming. Keep the discussion grounded in the illustration. Let students respond orally, through a drawing or with a short descriptive sentence.
Best for: An inclusive group mural with an observation-and-language extension
Details from the listing:
- Printable PDF
- 25 picture tiles, each 7 × 7 inches
- 35 × 35-inch assembled poster (89 × 89 cm)
- Assembly map and built-in glue tabs; print single-sided
4. Stir in Love, Share a Memory Collaborative Poster
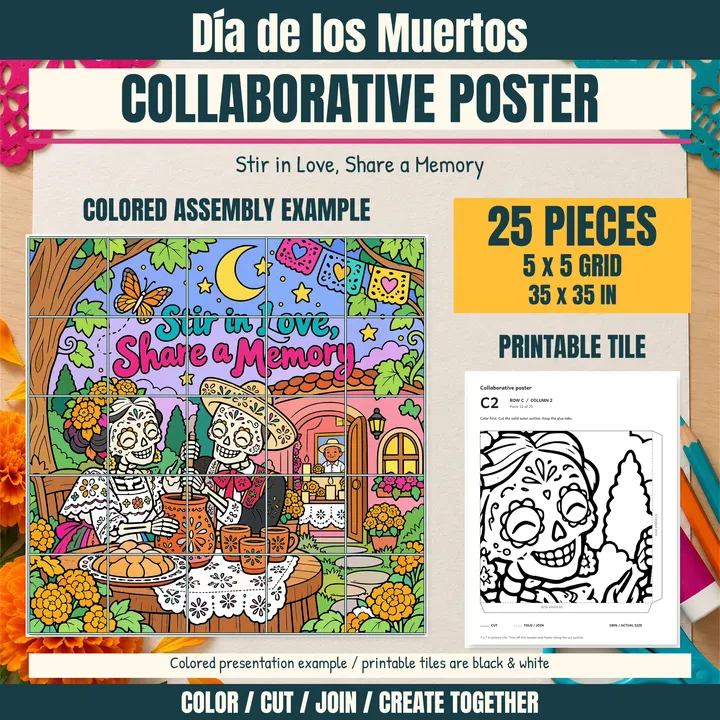
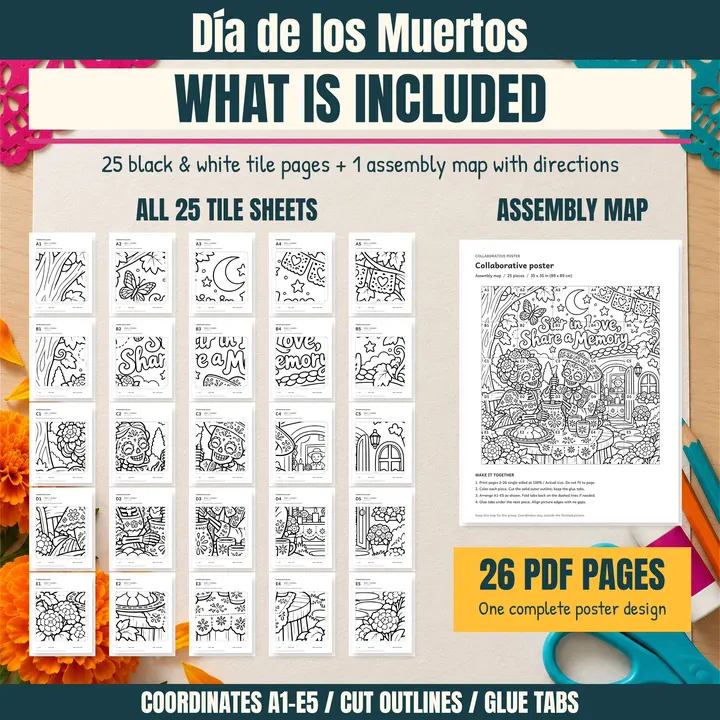
Stir in Love, Share a Memory places its message alongside calaveras and an ofrenda in black-and-white line art. It offers an entry point for discussing how an illustration can suggest stories through objects and words. Students can concentrate on the image and its composition without bringing photographs or personal keepsakes. Use this poster with a museum explanation of ofrendas rather than treating the printed picture as a complete model of every family's observance.
Classroom idea: Read a teacher-selected account of foods included in one particular family's or community's observance. Then ask students to write a caption explaining one thing they learned from that source. Display the captions beside the artwork, keeping source-based learning separate from optional personal sharing.
Best for: Connecting visual art with discussion of food and storytelling
Details from the listing:
- Printable PDF with black-and-white line art
- 25 picture tiles, each 7 × 7 inches
- 35 × 35-inch assembled poster (89 × 89 cm)
- A1–E5 assembly map and glue tabs; print pages 2–26 single-sided at 100%
5. Petals Carry Our Love Collaborative Poster
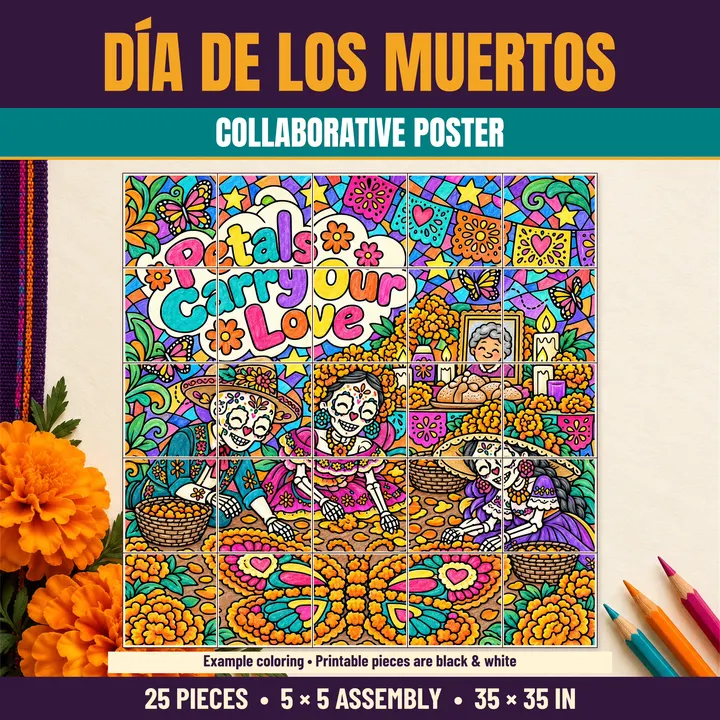
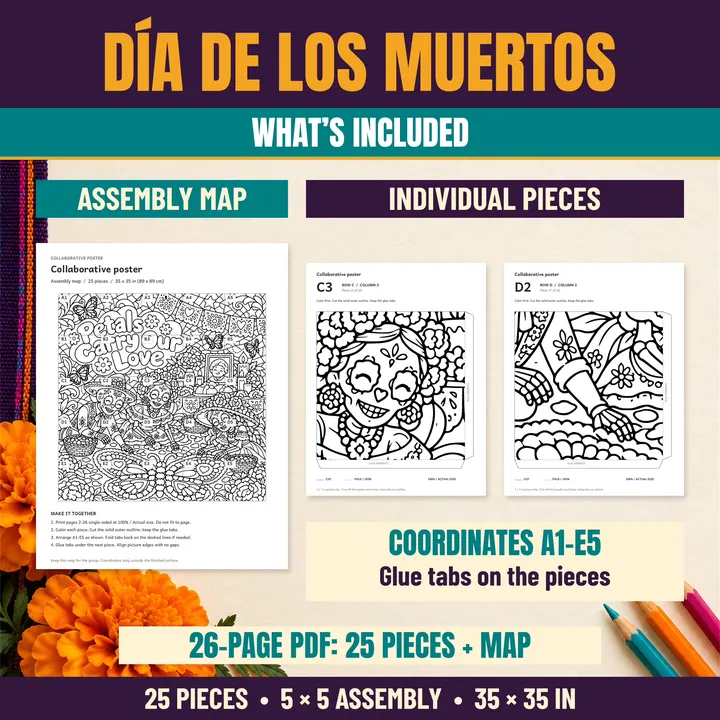
Petals Carry Our Love features sugar skulls, monarch butterflies and marigolds in a shared coloring design. Its combination of wings and petals lends itself to an art discussion about repeated shapes, curved lines and color relationships. Each section contributes to a final square mural rather than a set of separate finished pictures. Choose this design for a class that enjoys close looking and wants to practice making individual artistic choices within a coordinated group project.
Classroom idea: Give each group two observation prompts: find a curved line and find a repeated shape. Students can sketch a small example on scrap paper before coloring their tile. After assembly, compare how those forms appear in different parts of the full poster.
Best for: Comparing natural forms in a flower-and-butterfly composition
Details from the listing:
- Printable PDF for standard 8.5 × 11-inch paper
- 25-piece collaborative poster
- 35 × 35-inch assembled poster (89 × 89 cm)
- A1–E5 assembly guide; print pages 2–26 single-sided at 100%
6. A Place to Remember, A Moment to Share Collaborative Poster
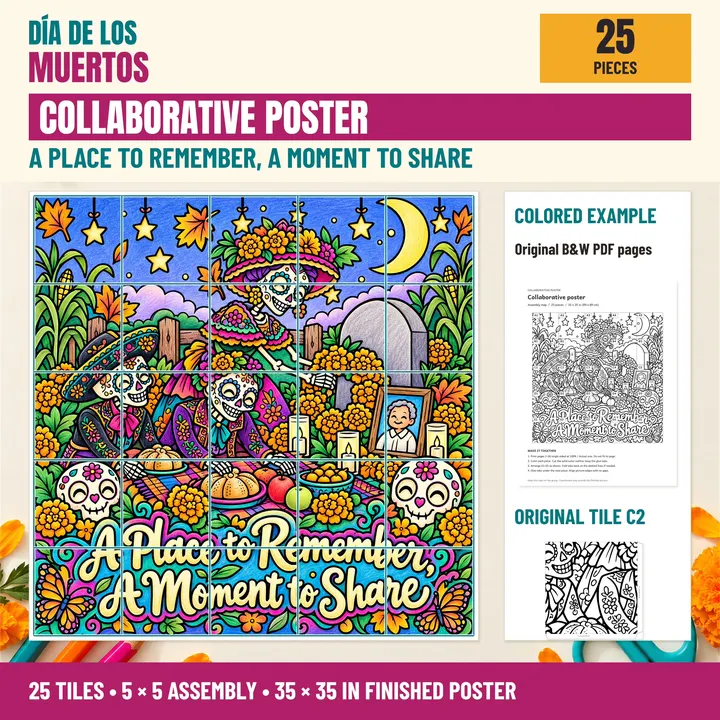
A Place to Remember, A Moment to Share includes calaveras, an ofrenda and marigolds around its central message. The composition provides several details for students to identify as they connect the small sections into a single picture. This is a useful option for pairing a collaborative mural with a short vocabulary lesson. Introduce the cultural context first, then use the finished artwork as a place to revisit words and observations rather than as a substitute for learning about real communities.
Classroom idea: Build a small bilingual word bank with teacher-checked terms such as flower, memory and offering. Students can choose one term to illustrate on a separate label. Attach the labels around the mural, making clear that ofrendas and the objects included in them vary among families and communities.
Best for: Learning ofrenda vocabulary through a source-supported display
Details from the listing:
- Printable PDF
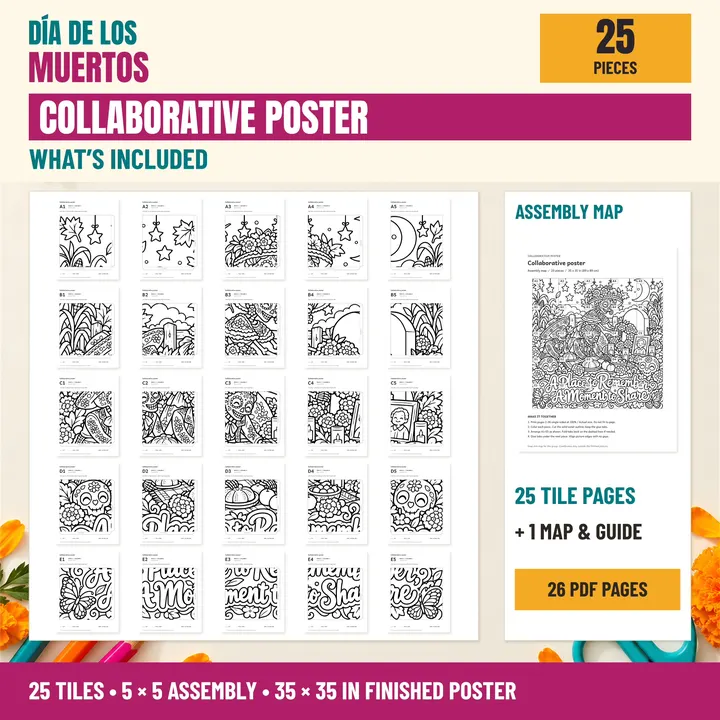
- 25-piece black-and-white collaborative poster
- 35 × 35-inch assembled poster (89 × 89 cm)
- A1–E5 assembly map and glue tabs; print single-sided on letter paper at 100%
7. Little Paws, Lasting Memories Collaborative Poster
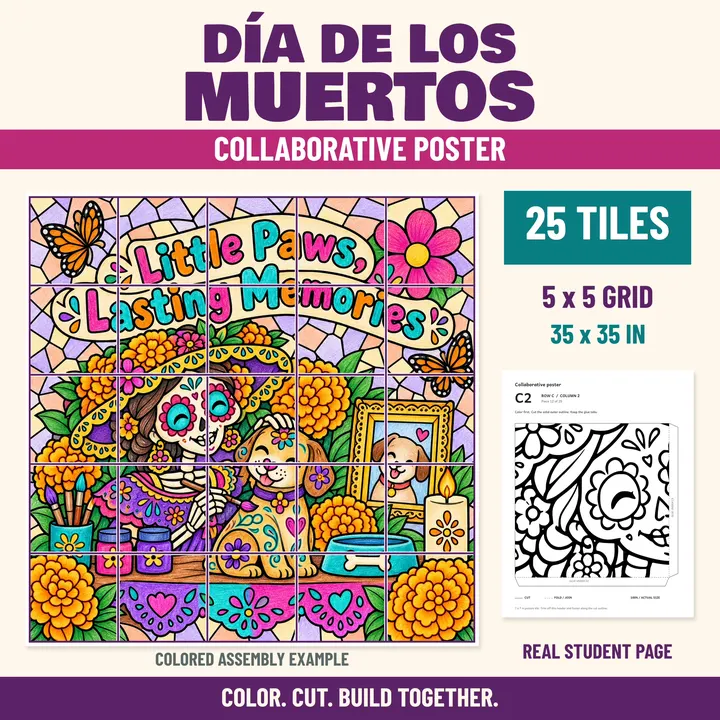
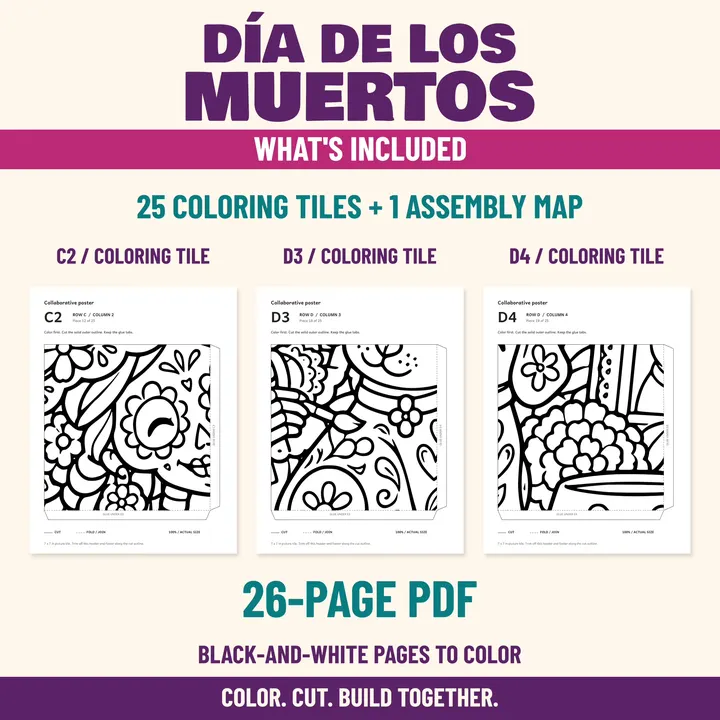
Little Paws, Lasting Memories features a girl depicted with sugar-skull imagery and her dog. Compared with the flower- and ofrenda-centered designs, this poster gives the class a character-focused scene to study. Students can discuss how the figures and the message work together before coloring their own sections. The pet theme may prompt strong feelings for some children, so keep the activity centered on observation and offer personal storytelling only as a choice.
Classroom idea: Invite students to describe the relationship suggested by the two figures using details they can actually see. As an optional extension, they can write about kindness toward an animal, choose a fictional character or simply label a visual detail. No student needs to discuss a pet's death.
Best for: A character-focused art project with an optional writing connection
Details from the listing:
- Printable PDF for standard 8.5 × 11-inch paper
- 25 picture tiles, each 7 × 7 inches
- 35 × 35-inch assembled poster (89 × 89 cm)
- Assembly map and coordinate system; print single-sided at 100%
8. Butterflies Carry Our Remembrance Collaborative Poster
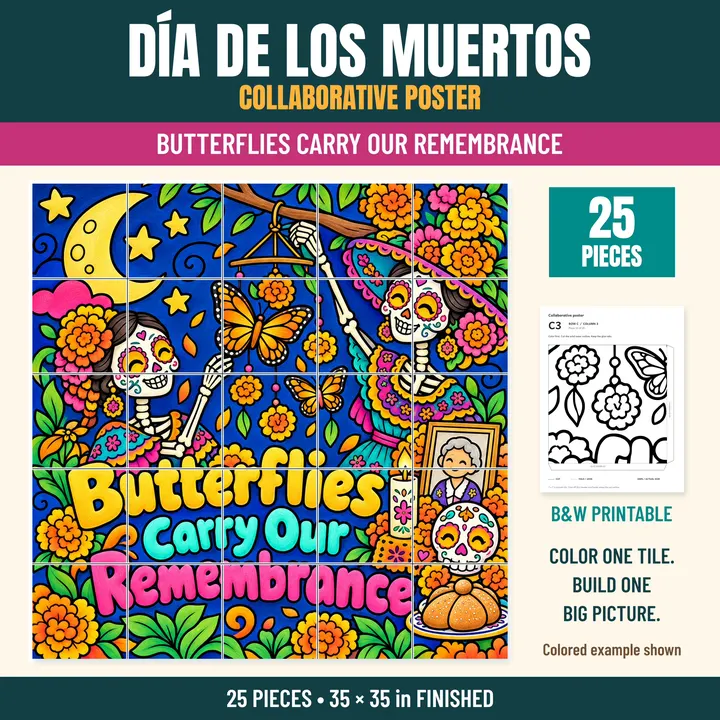
Butterflies Carry Our Remembrance pairs its butterfly message with calaveras and marigolds. The design can anchor a classroom art display while opening a carefully framed conversation about the difference between observing an animal and interpreting a cultural symbol. Have students notice what the drawing shows, then consult a named source for any symbolic meaning discussed. The separate coloring pages also make it possible to share the art task across small groups before bringing the mural together.
Classroom idea: Make a two-column chart headed What we observe and What our source explains. Put visible details from the poster in the first column and attributed cultural information in the second. Students can add one observation after coloring and help check that the two kinds of statements stay distinct.
Best for: An art-and-science connection with careful cultural attribution
Details from the listing:
- Printable PDF
- 25 individual coloring pages
- 35 × 35-inch assembled poster (89 × 89 cm)
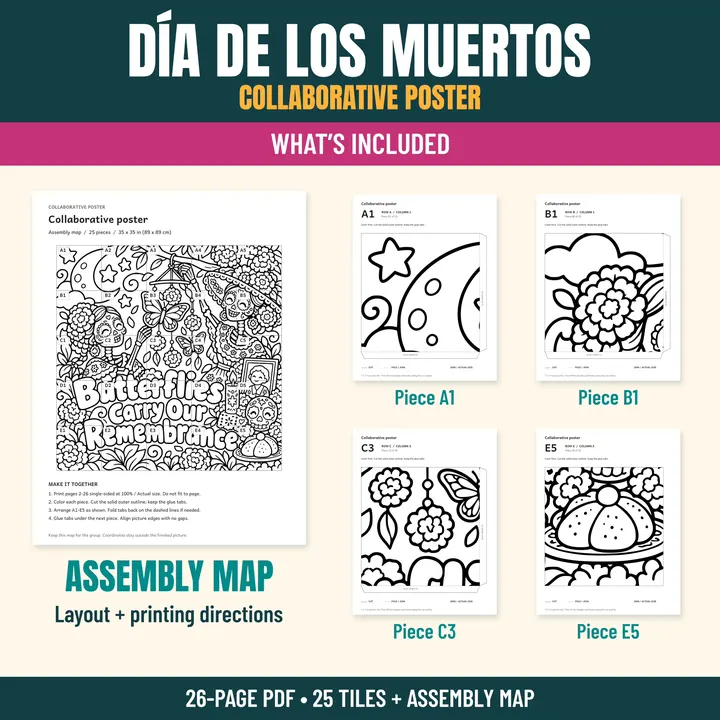
- Step-by-step assembly map; print single-sided at 100%
9. Bring a Memory to the Ofrenda Collaborative Poster
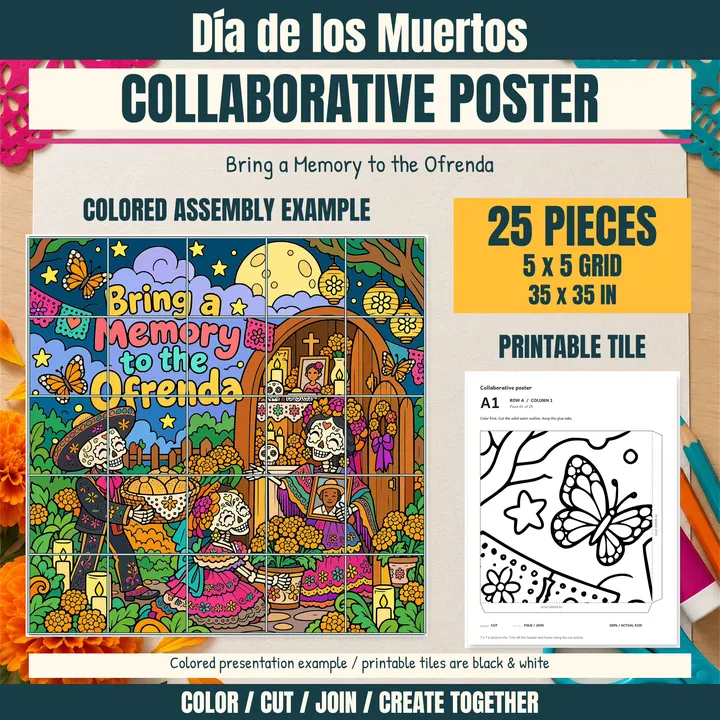
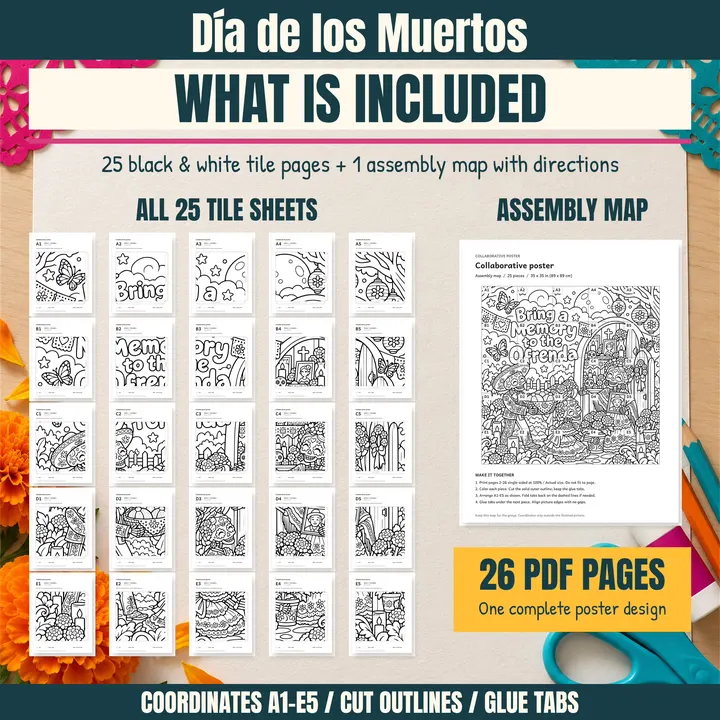
Bring a Memory to the Ofrenda combines calaveras, marigolds and an ofrenda in a large black-and-white drawing. Its wording makes the connection between remembrance and the pictured setting especially direct. Before using it, explain what an ofrenda is through a trustworthy cultural source and acknowledge that practices differ. The coloring project itself can remain a shared art task; children do not need to contribute family photographs, names or stories to participate fully.
Classroom idea: Show a museum photograph of a documented ofrenda and identify the person or community that created it. Ask the class to notice how specific objects help tell a story. Students can write a source-based caption for the classroom poster without constructing an altar or sharing family belongings.
Best for: A museum-source discussion about remembrance and objects
Details from the listing:
- Printable PDF for standard 8.5 × 11-inch paper
- 25-piece black-and-white collaborative poster
- 35 × 35-inch assembled poster (89 × 89 cm)
- One-page assembly guide, instructions and built-in glue tabs
10. Celebrate Lives / Cherish Memories Collaborative Poster
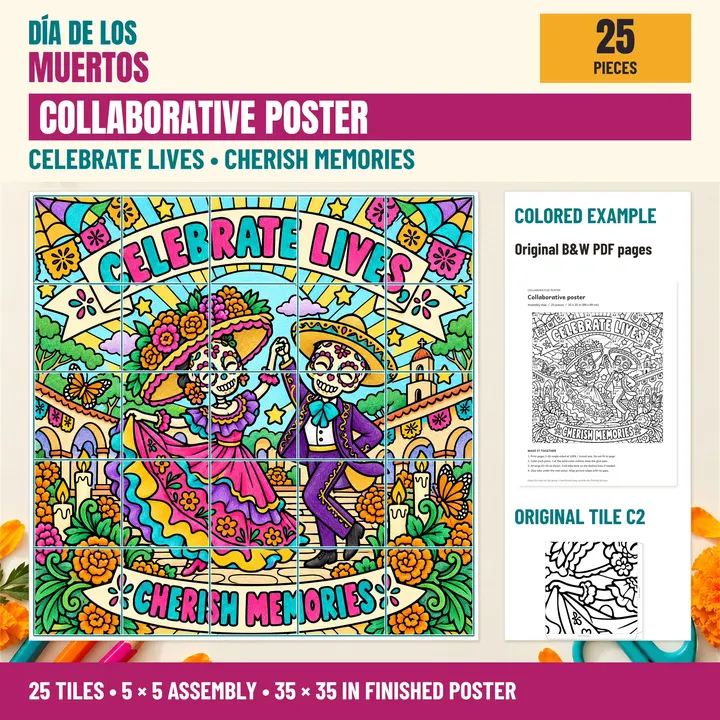
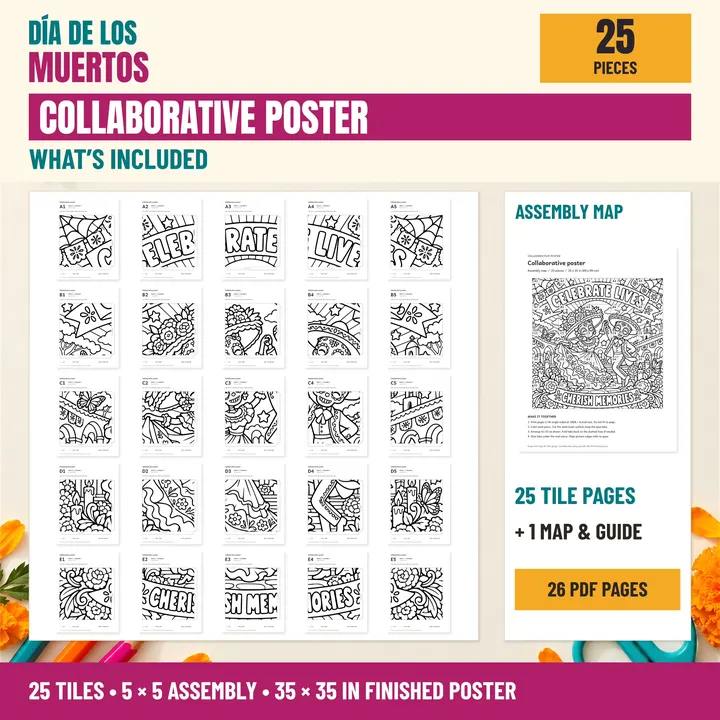
Celebrate Lives and Cherish Memories are the two messages in this design, which also includes calaveras, papel picado and marigolds. It offers a clear lettering focus for students who enjoy tracing how words become part of an illustration. The class can compare the message and surrounding details as the separate tiles are assembled. Use the finished piece to accompany descriptive student writing and a short cultural explanation, giving the display both visual interest and learning context.
Classroom idea: Ask students to choose one of the two printed messages and explain how a visible detail supports it. Provide a sentence starter such as The artist connects these words with ___. Collect several different responses around the mural to show how classmates read the same artwork.
Best for: Combining a collaborative display with a descriptive writing task
Details from the listing:
- Non-editable printable PDF for standard 8.5 × 11-inch paper
- 25 individual coloring pages
- 35 × 35-inch assembled poster (89 × 89 cm)
- Assembly map and teacher instructions; print at 100% / Actual Size
11. A Portrait Framed with Love Collaborative Poster
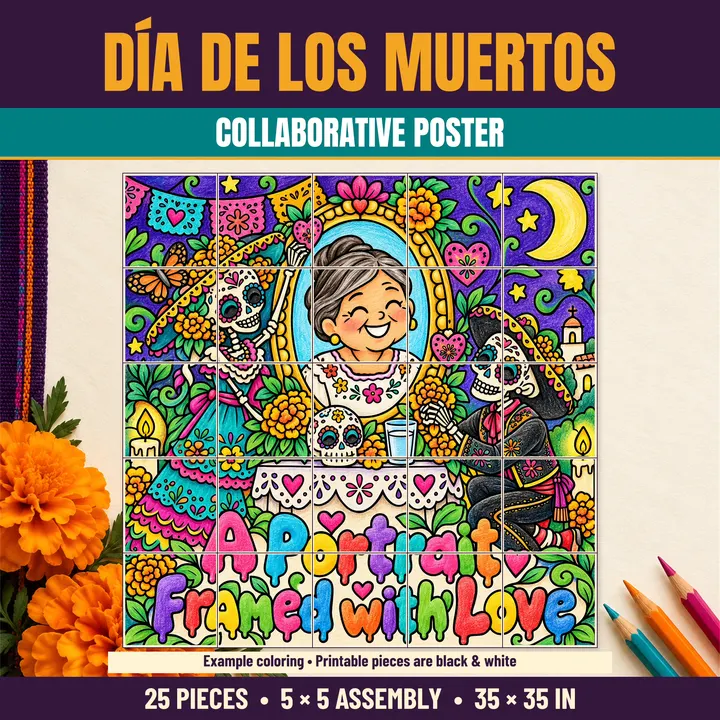
A Portrait Framed with Love features sugar skulls, marigolds and a remembrance message in a 25-piece composition. The title provides a useful prompt for examining how a frame can draw attention within a picture. Students can study the design before working on their individual tiles, then return to that question when the full image is visible. This poster works well alongside an art-focused conversation about emphasis, borders and the role of words in a visual composition.
Classroom idea: After assembly, invite students to point out what attracts their attention first and explain why. They can then sketch a simple frame around a word they value on a separate piece of paper. Display those sketches nearby as an optional art extension rather than an added product component.
Best for: Studying framing and lettering in a shared art composition
Details from the listing:
- Printable PDF with black-and-white line art
- 25 picture tiles, each 7 × 7 inches
- 35 × 35-inch assembled poster (89 × 89 cm)
- A1–E5 assembly map and cut-and-glue guidelines; print pages 2–26 single-sided at 100%
Plan a respectful art and learning sequence
Start with a source and a question
Read a short museum or heritage-source explanation before coloring. Locate Mexico on a map and ask a question such as How do images help people remember? Discuss the specific tradition in the source without asking students to speak for a whole culture. An illustrated classroom poster supports the lesson; its decorative elements do not replace research.
Make room for different ways to participate
Explain that students can discuss a museum example, a fictional character, an artwork or an everyday kind action instead of sharing a personal loss. Personal remembrance should be voluntary. Give the same value to coloring, sorting, checking coordinates and writing a factual caption. Do not require photographs, names of deceased relatives or disclosure of family beliefs.
Make and discuss the shared picture
Distribute all 25 picture tiles and keep the assembly guide at the teacher table. A smaller class can share extra pieces; a larger class can use partners and assembly roles. Plan coloring and assembly as separate stages, allowing time for detailed designs and individual pace. Before joining pages, arrange the five rows and five columns so students can check the developing image.
After assembly, choose one product-specific extension above. Separate observations about the artwork, facts learned from a source and ideas invented by students. A final caption can name the project, describe how the class cooperated and credit the cultural learning source.
Print and assemble the 25-piece poster
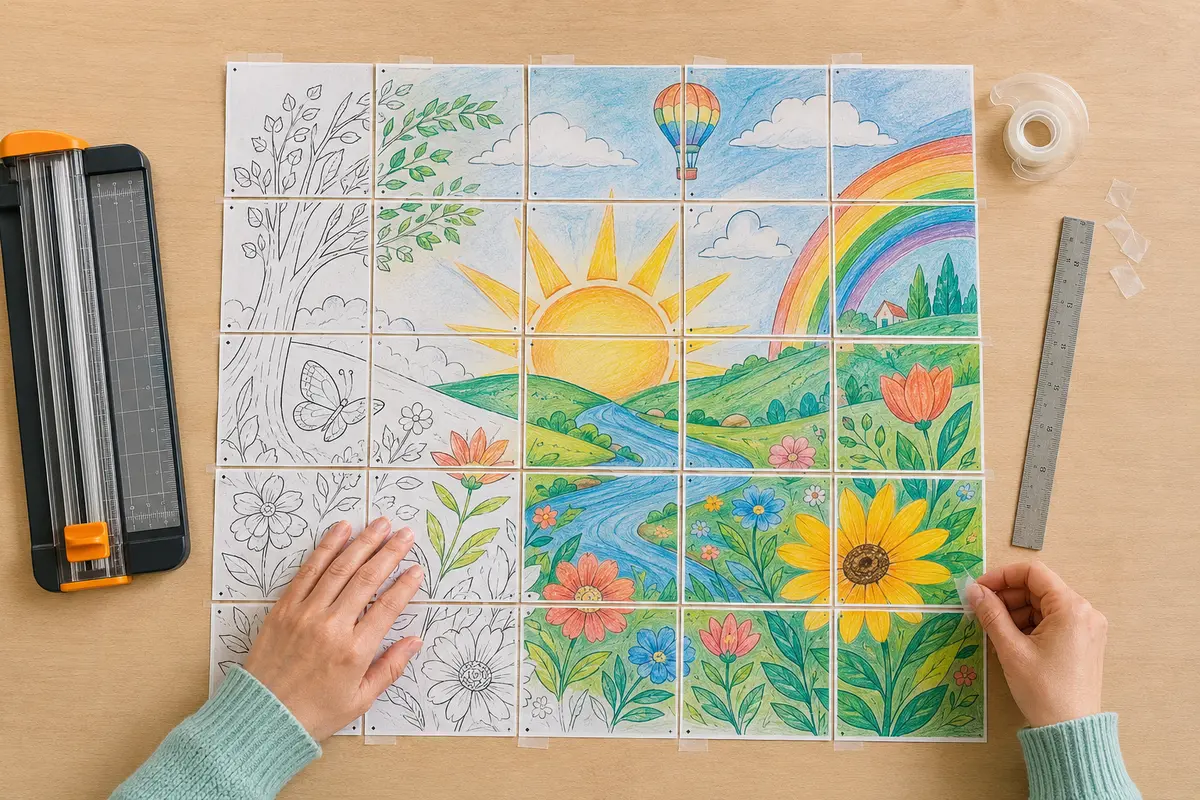
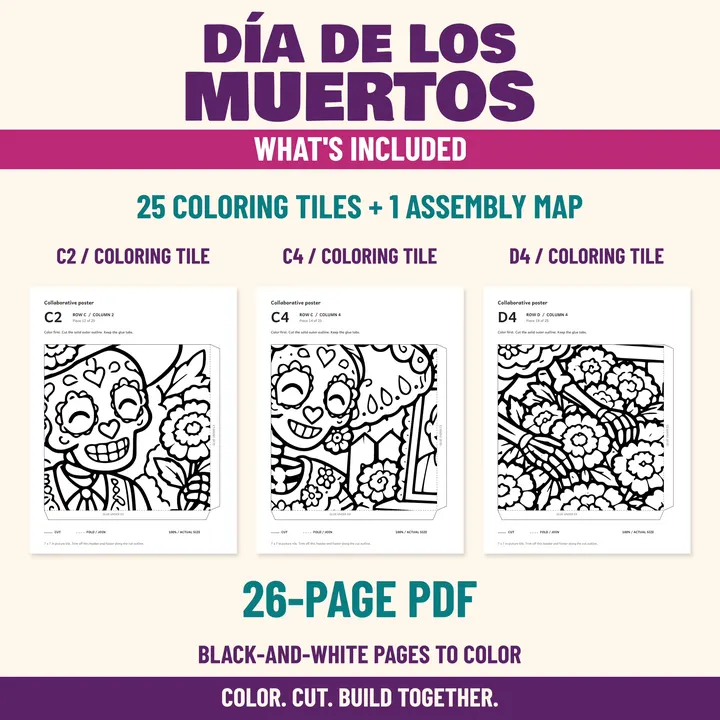
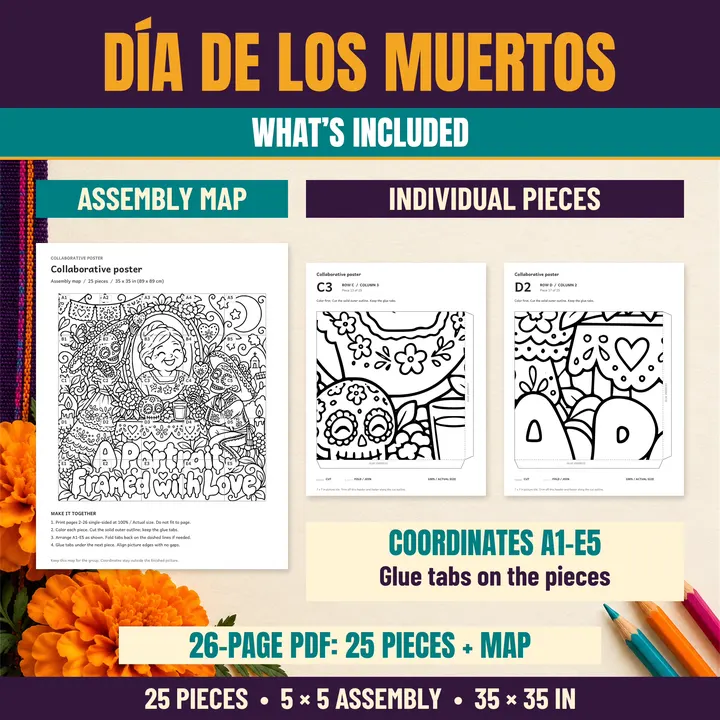
- Download the chosen PDF and read its own directions. The checked listings describe 25 picture tiles and an assembly map, with a 35 × 35-inch finished picture (about 89 × 89 cm).
- Use the paper size and student-page range specified in your file. Print one test page before the full set; many gallery previews specify single-sided printing at 100% or Actual Size.
- Keep the same scale and orientation for every tile. A listed 7 × 7-inch picture area is not the whole printer sheet.
- Color the black-and-white pages before trimming. Preserve joining tabs and follow the file's cut and fold markings. The colored covers show possible finishes rather than precolored student pages.
- Lay out the A1–E5 grid against the map, check neighboring picture edges and join manageable rows. Follow the product's directions for tabs and adhesive.
- Leave room around the finished square for your lesson caption and optional student responses.
For a longer walkthrough, read how to print and assemble a collaborative poster.
Create a bulletin board that explains the learning
Place the completed mural beside a brief, teacher-checked explanation of Día de los Muertos and a source label. Add a few visual observations, vocabulary notes or teamwork reflections. Keep the display uncluttered so the chosen message is readable. Any personal names, photographs or family stories should be shared only voluntarily and through your school's usual permissions.
Use the display as a starting point for further reading about a particular community, artist or family tradition. For a separate November writing routine, see National Gratitude Month classroom ideas; keep the purposes and cultural contexts of the two lessons clear.
Sources for the cultural introduction
Choose your Día de los Muertos class project
Choose a design that suits your lesson, preview its pages and give every learner a useful part in the shared artwork. Use the individual product links above, or browse all Day of the Dead collaborative posters →.
Collection membership, product details and gallery images checked against the public shop on October 24, 2026. Classroom extensions are teacher suggestions. Cultural context is supported by the sources above; no single illustration represents every family's traditions.
Ready to create together?
Choose a printable, give every student a piece, and watch the big picture come to life.
Explore Day of the Dead posters ↗Frequently asked questions
How should I introduce Day of the Dead before the art task?
Use a teacher-selected cultural or museum source before discussing the illustration. Explain the specific example you are studying and keep decorative artwork separate from claims about how every family observes the occasion.
Must students share a personal memory or family photograph?
No. Students can respond to a museum example, a fictional character or a visible artwork detail. Coloring, sorting and assembly provide useful participation without personal disclosure.
What format and dimensions do the checked products describe?
The resources are digital PDFs with 25 black-and-white picture tiles and an assembly layout. The checked listings describe a five-by-five picture measuring 35 × 35 inches at the intended scale. Follow the exact file directions.
Are the writing and discussion tasks included as worksheets?
No. They are suggested teacher-led extensions in this guide. The individual product links identify the printable files and assembly materials included with each resource.